


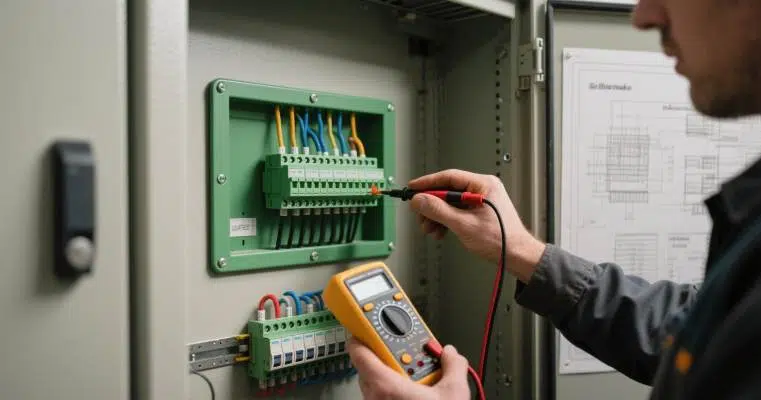
Панельное крепление вставного клеммного блока предлагает надежное и эффективное решение для безопасного электрического соединения, сочетая в себе универсальность и удобный дизайн. Их модульная структура позволяет легко подключать, обслуживать и изменять конфигурацию, что делает их идеальными дляПромышленность, автоматизация и управление.
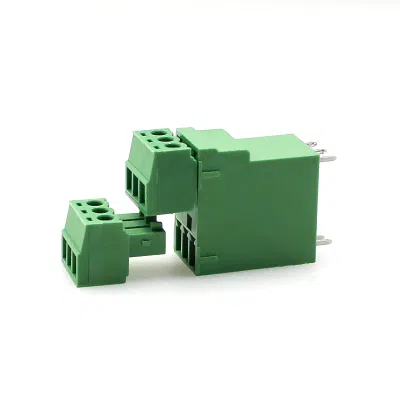
Это руководство поможет вам разобраться в процесс установки шаг за шагом, обеспечивая плавную и беспроблемную установку. Независимо от того, опытный вы специалист или начинающий пользователь, наши инструкции помогут вам правильно установить и подключить ваш клеммная колодка панель с уверенностью. Давайте начнем!
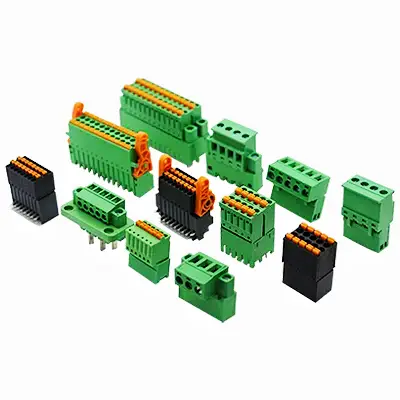
Recommended Product – Explore More from AOSI
Discover AOSI’s solutions designed for industrial automation, control panels, and power systems. Reliable performance, certified quality, and customizable options — all directly from the source factory.
Часть 1 Начало работы: Основные инструменты и советы по безопасности при установке сменных клеммных колодок
Установка съемный клеммный блок для монтажа на панель это несложный процесс, но правильная подготовка гарантирует безопасную и эффективную установку. Прежде чем приступить к установке, соберите необходимые инструменты и материалы и ознакомьтесь с основными мерами предосторожности, чтобы избежать опасности.
1. Необходимые инструменты и материалы
- A отвертка(обычно плоская головка или Phillips, в зависимости от типа клемм)
- Зачистки проводовдля подготовки проводников
- Мультиметр(необязательно, для проверки соединений)
- Крепежные винты или зажимы(если не входит в комплект поставки клеммной колодки)
- Провода надлежащего размера(проверьте спецификацию производителя на предмет калибра и типа)
- Инструменты для маркировки(опционально, для организации соединений)
2. Меры предосторожности
Работа с электрическими компонентами требует осторожности. Следуйте этим рекомендациям:
- Отключите питание перед установкой во избежание поражения электрическим током или короткого замыкания.
- Убедитесь, что номинальные значения напряжения и токаклеммной колодки в соответствии с вашим применением.
- Убедитесь, что провода надежно закреплены, чтобы избежать ослабления соединений, которое может привести к перегреву.
- Носитеизолированные перчаткипри работе с токоведущими цепями и работайте в сухом помещении.
Подготовив инструменты и соблюдая меры безопасности, вы обеспечите беспроблемный и безрисковый процесс установки вашего съемный клеммный блок для монтажа на панель. Далее мы проведем вас по этапам монтажа и подключения.
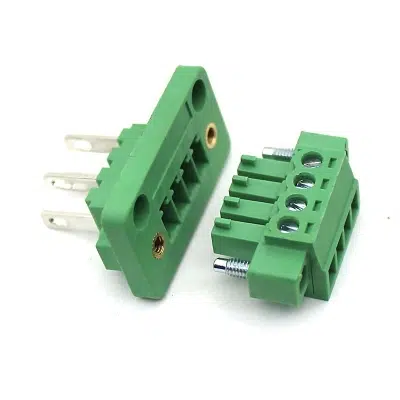
Часть 2 Пошаговое руководство по установке съемных клеммных колодок на панель
Следуйте этой подробной процедуре, чтобы обеспечить правильную установку вашего съемный клеммный блок для крепления на панель:
1. Подготовка панели
- Сверьте размеры выреза в панели со спецификациями производителя
- Очистите монтажную поверхность для обеспечения надлежащего контакта и выравнивания
2. Процесс монтажа
- Совместите корпус клеммного блока с подготовленным вырезом в панели
- Закрепите с помощью прилагаемого крепежа (зажимов или винтов).
- Во избежание деформации при затяжке прилагайте равномерное давление (рекомендуемый момент затяжки: 0,6-0,8 Нм).
3. Процедура подключения
- Зачистите концы проводов до длины 7±0,5 мм с помощью соответствующих инструментов
- Вставьте проводники в обозначенные клеммы, соблюдая полярность.
- Затяните винты клемм с указанным моментом (обычно 0,5 Нм).
- При многожильных соединениях убедитесь, что все жилы правильно зафиксированы
- Прокладывайте провода аккуратно, чтобы избежать натяжения соединений
4. Окончательная верификация
- Проведите испытание на растяжение (усилие не менее 15 Н) на каждом соединении
- Визуально проверьте правильность посадки проводов и зазор между изоляцией
- Убедитесь в наличии звукового щелчка при зацеплении разъемного соединения
- Убедитесь в плавном соединении/разъединении подключаемых компонентов
Напоминание о безопасности: Перед установкой всегда обесточивайте систему и проверяйте все соединения перед подачей питания.
Часть 3 Профессиональные советы по повышению эффективности
Чтобы обеспечить максимальную производительность и долговечность вашего съемный клеммный блок для монтажа на панельСледуйте этим профессиональным советам по установке и обслуживанию:
1. Оптимизируйте подготовку проводов
- Постоянная длина полос: Соблюдайте равномерную длину ленты (обычно 6-8 мм), чтобы обеспечить надлежащий контакт с клеммами и избежать ослабления нитей.
- Скрученные провода: Слегка скрутите многожильные проводники перед установкой, чтобы предотвратить их истирание и обеспечить надежную фиксацию.
- Используйте феррулы (необязательно):Для тонкожильных проводов обжимайте обоймы, чтобы повысить прочность и предотвратить разрыв проводов.
2. Ускоренная установка
- Предварительно соберите компоненты: Если возможно, предварительно подключите клеммный блок перед монтажом, чтобы упростить выравнивание.
- Соединения этикеток:Используйте маркеры или бирки для идентификации проводов, что ускорит дальнейшее обслуживание или устранение неисправностей.
- Проверьте настройки крутящего момента:Используйте динамометрическую отвертку, чтобы избежать недостаточной или избыточной затяжки, которая может привести к ухудшению проводимости или повреждению.
3. Обеспечение долгосрочной надежности
- Периодические проверки:Проверяйте затяжку клемм во время планового обслуживания, чтобы избежать ослабления из-за вибрации.
- Безопасная прокладка проводов:Используйте кабельные стяжки или зажимы, чтобы упорядочить провода и уменьшить нагрузку на соединения.
- Проверьте, прежде чем приступить к работе:Перед включением системы проверьте целостность с помощью мультиметра.
Следуя этим рекомендациям, вы обеспечите быстро, надежно и эффективно установка и минимизация будущих проблем.
Если вам требуется дополнительная помощь в установке панели со сменными клеммными блоками, наши технические специалисты предлагают индивидуальные консультации для обеспечения оптимальной настройки.