


Wiring a push-in terminal block is a straightforward and efficient way to establish secure electrical connections for your projects or automation systems. This guide will take you through each essential step, from preparing the wire to ensuring safe, reliable connections. Whether you’re a DIY enthusiast or a professional technician, following these instructions will simplify your wiring tasks.
Tools and Materials You’ll Need
Before starting, you need to prepare for the following tools and materials:
- Wire stripper – for precise insulation removal.
- Ferrules or solid wires – required for secure insertion.
- Screwdriver or lever tool – only needed for wire removal.
- DIN rail (EN 60715) – for mounting the terminal block.
- Multimeter – to test continuity and voltage after wiring.
💡 Pro Tip: Always check the wire range specified on the terminal (e.g., 0.5–2.5 mm²) before wiring to ensure optimal contact performance.
Step 1 – Strip the Wire
Proper wire stripping ensures strong electrical contact and prevents copper strands from bending or breaking.
- Use a high-quality wire stripper to remove approximately 10–11 mm of insulation.
- For stranded wires, crimp a ferrule at the end for a smooth cylindrical surface.
- Make sure no bare copper is left exposed outside the terminal entrance.

Step 2 – Insert into Push-in Clamp
This is the key advantage of push-in technology — quick and tool-free insertion.
- Simply push the prepared wire straight into the round conductor entry hole.
- The internal stainless-steel spring clamp will automatically grip the conductor tightly.
- No screwdriver or torque adjustment is needed.
- Once inserted, lightly pull the wire to confirm it is securely fixed.
The push-in connection saves up to 70% of wiring time compared to traditional screw connections.
🔗 For detailed explanation of the mechanism, see Push-in Connection Technology in Terminal Blocks
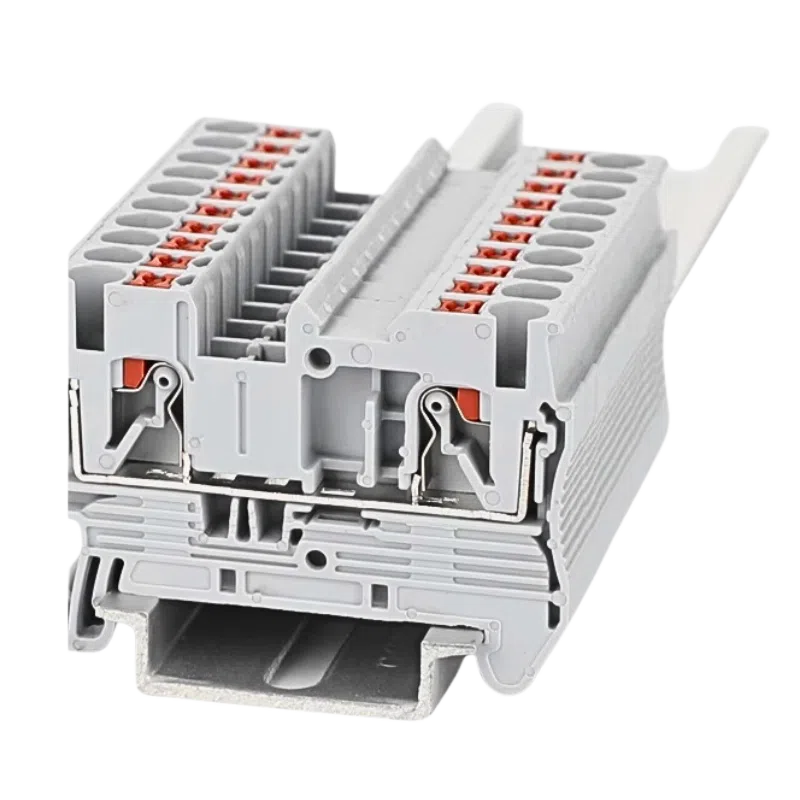
Push in Din Rail Terminal Blocks
- Tool-free push-in connection, saves wiring time
- Multi-level (2-tier/3-tier) options for compact panels
- 2.5–6 mm² / 24V–600V / feed-through & grounding
- Phoenix/Weidmüller equivalent models available
Step 3 – Check Connection & Pull Test
After inserting all conductors:
- Perform a gentle pull test on each wire to ensure proper locking.
- Use a multimeter to verify continuity between input and output points.
- Check that wires are aligned in the same direction — consistent routing improves visual inspection and safety.
This verification step is essential before powering the system, especially for multi-layer or high-density terminal blocks used in PLC control panels.
Step 4 – Release Wire (Button or Lever)
Removing a wire from a push-in terminal block is equally simple.
- Locate the orange release button or lever on the terminal.
- Press it gently using a flat screwdriver or finger.
- While pressing, pull the wire straight out to avoid bending or damaging the clamp.
Some models feature lever-type mechanisms that make this process even faster, ideal for frequent maintenance in automation systems.
Safety and Maintenance Tips
Proper wiring ensures long-term reliability and prevents overheating or short circuits. Follow these best practices:
- Always verify conductor size and insulation rating.
- Avoid inserting tinned or oxidized wires directly.
- Maintain clear labeling for each terminal point.
- Keep the panel clean and dust-free to avoid contact oxidation.
- Recheck connections periodically during equipment maintenance.
With these precautions, push-in terminals can perform safely for over 10 years without requiring re-tightening — a key reason they’re preferred in modern industrial automation.
FAQ – How to Wire a Push-in Terminal Blocks
A1: Push-in terminal blocks use a spring clamp mechanism that automatically grips the conductor when inserted. The internal stainless-steel spring maintains constant contact pressure on the wire, ensuring a gas-tight and vibration-resistant connection. This eliminates the need for screws or torque tools and allows for faster wiring.
A2: Most push-in terminals require the insulation to be stripped 10–11 mm (0.4 in) before insertion. This length ensures full contact with the spring while preventing exposed copper. Always verify the exact stripping length specified in the manufacturer’s datasheet.
A3: For stranded wires, using ferrules is recommended because they compress loose strands and ensure consistent contact. For solid wires, ferrules are not required — the conductor can be inserted directly. This recommendation is aligned with IEC 60352-7 and UL 1059 wiring standards.
A4: Most push-in terminals have an orange or gray release button. Press this button with a screwdriver or fingertip while gently pulling the wire straight out. This releases the spring clamp safely without damaging the conductor.
A5: Yes. Industrial-grade push-in terminals are designed to handle up to 57 A depending on the pitch and conductor size. For example, AOSI’s PT6 and PT10 models are suitable for power circuits and comply with IEC 60947-7-1 current-carrying capacity requirements.
A6: Push-in terminals provide consistent clamping force, eliminating the risk of loose screws from vibration or temperature cycling. They are maintenance-free, faster to wire, and reduce installation errors by 50–70%. This makes them safer for industrial control cabinets, PLC systems, and building automation.
Conclusion
Push-in terminal blocks have transformed wiring practices in both industrial and DIY applications. By following these simple steps—strip, insert, test, and release—you can achieve reliable and maintenance-free connections in minutes.
For certified, factory-direct solutions that combine speed and safety, explore the Push-in Terminal Block Series designed for PLC, power, and automation systems.